Table of Contents
Getting Started
Download an installer, supported platforms are Windows, macOS, and Ubuntu (or other Debian-based) Linux.
Requirements:
-
Java runtime
-
(for Android use) Android SDK (or Android Studio) installed
-
at least 16GB RAM
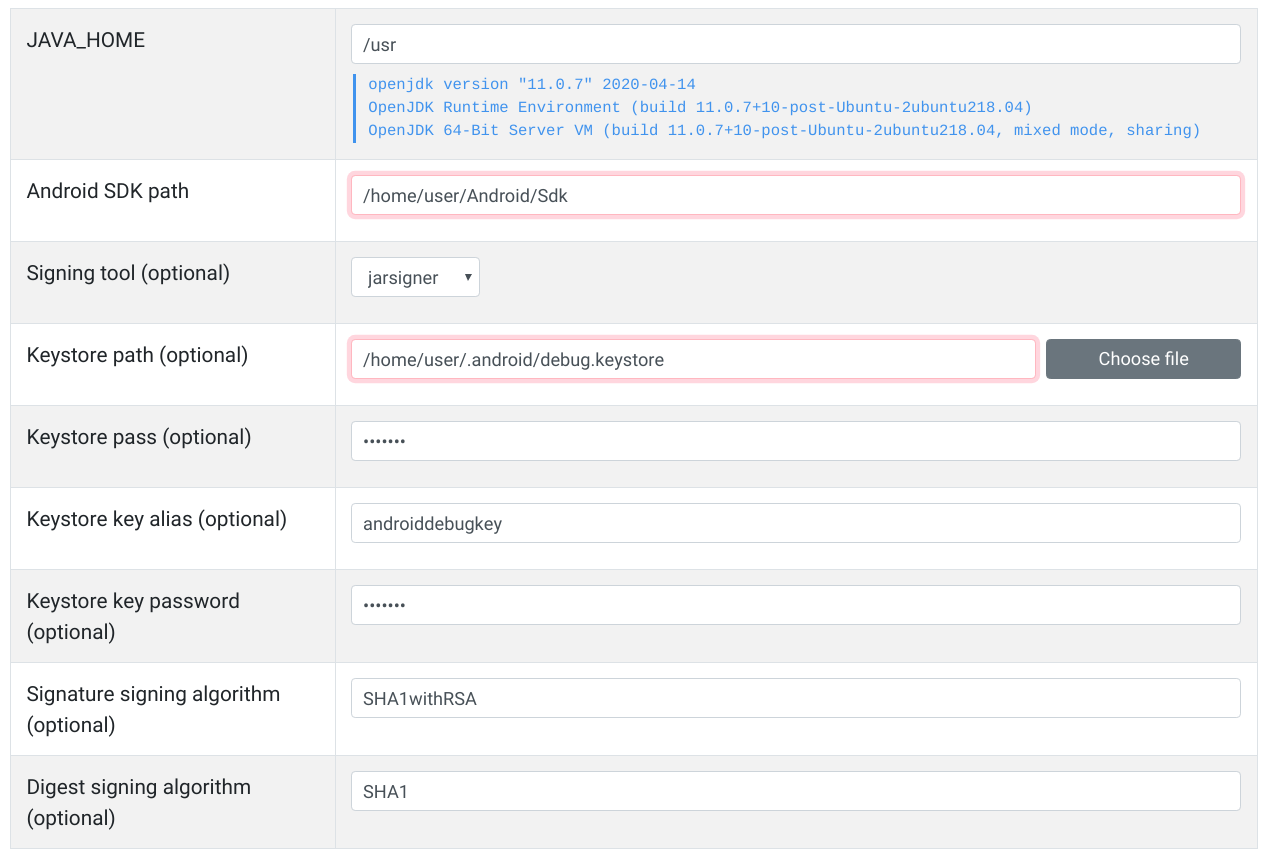
The first time Clyze starts, its setup asks for a number of settings:
-
The installation paths of Java and Android SDK.
-
The signing setup for the packaging step, so that packaged apps are ready to be tested on a device or emulator. The default is the debug keystore of Android Studio. You can also leave these settings empty for now. For more details, see Signing.
Basic Workflow
Clyze takes your app and packaging rules and gives you full control over app packaging.
The app and the rules together form a code build, or just build. You can load your build in Clyze, modify its rules, see the results before packaging, and finally package your app. If you don’t like the result, you can retry the process: the UI offers full control over rules (even those autogenerated by libraries and SDK tools) and shows visually the results of every rule modification.
Builds are grouped into projects, which accumulate builds with the same characteristics (usually builds taken from the same app at different times). Projects provide metrics, so you can see how the packaging of your app evolves over time.
Creating Builds
To load your project to Clyze as a build, you could use one of the automatic integrations with a build system or import code manually.
For Android, it is highly recommended that you use one of the provided build system (Gradle, Buck) integrations. The build system integration will collect all the necessary binary, source, and configuration (.pro) files necessary for Clyze to operate. You can also import an unreduced, obfuscated APK (or AAB) file and .pro files manually. However, this is only recommended for exploratory use (i.e., if you do not expect to get a usable repackaged application) or for expert users who understand all the inputs involved in an Android build.
Android Build System Integration
If you are using Gradle with the Android Gradle Plugin, then you can add these lines to your build.gradle:
buildscript {
  repositories {
    maven { url "https://dl.bintray.com/clyze/plugins" }
  }
  dependencies {
    classpath 'com.clyze:gradle-plugin:4.0.+'
  }
}

apply plugin: 'clyze'

// Options, can be omitted for default target ('release' build, no flavor).
clyze {
  buildType = <BUILD_TYPE> // optional, default is 'release'
  flavor = <FLAVOR>        // optional, default is none
  aab = true               // optional, to use generated AAB, default is false (use generated APK)
}
In the snippet above, BUILD_TYPE is the build type ("debug" or
"release") of the target that packages your app. If you use flavors,
also set FLAVOR.
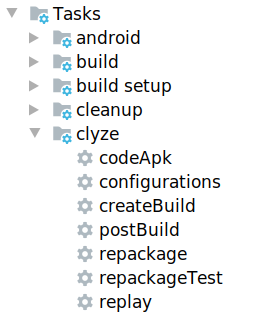
Finally, run the following Gradle tasks to create and post your build to Clyze:
gradle clean createBuild postBuildAlternatively, you can use the Gradle tasks from your IDE:
Manual Importing of Code
Clyze requires a set of JAR/WAR files (for Java use) or an APK/AAB that is not shrunk/obfuscated, as well as configuration rules for the project.
|
Note
|
For Android use, your configuration rules are not just the contents of the .pro files you have in build.gradle. Configuration rules may come from other sources, for example they can be generated by Android SDK tools or they may be provided by third-party libraries. |
To manually generate the Android configuration files to load to Clyze:
-
Add these lines to a clyze.pro file:
-dontoptimize
-dontobfuscate
-dontshrink
-printoptimization all-rules.txt-
Use the above configuration file in your build (for example, use
proguardFiles 'clyze.pro'in Gradle build scripts). -
Rebuild.
You will now have a suitable .apk/.aab and a file "all-rules.txt". Load them both in Clyze and create your build.
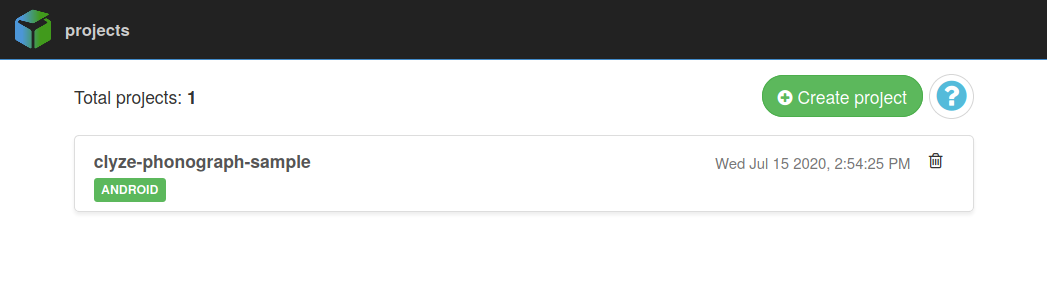
Project View
The first screen you will see after installation is the Project View. Here you can find a list of your projects, each containing your builds.
Click on a project to go the Build View.
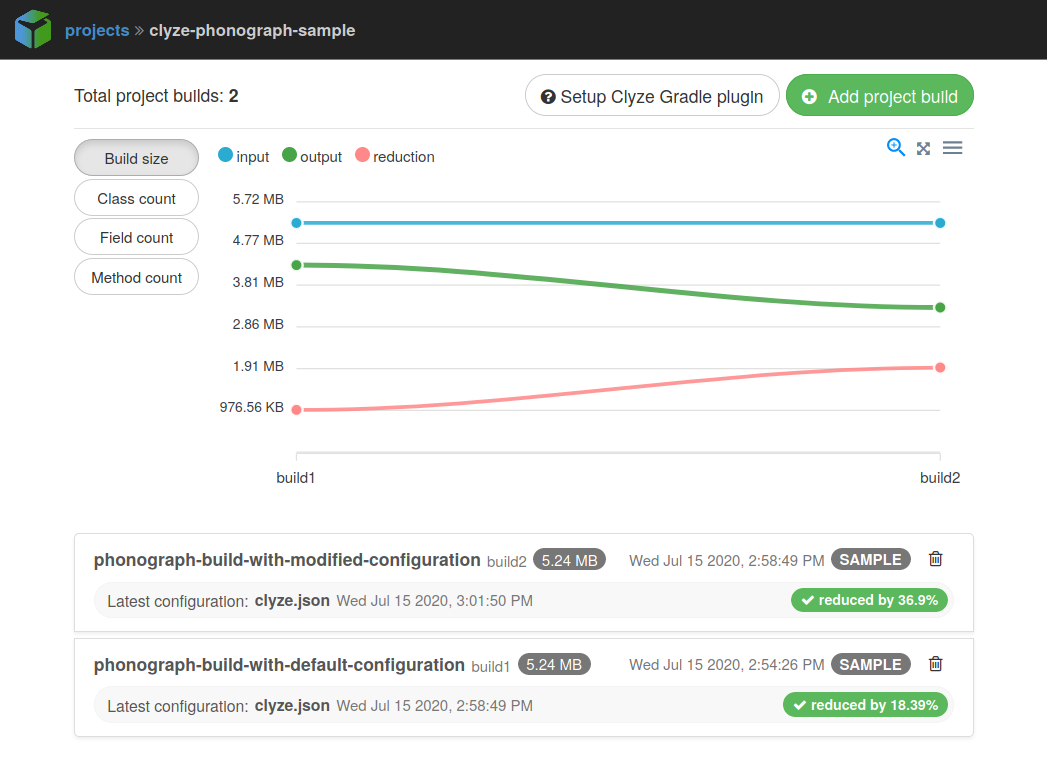
Build View
This screen shows all builds in a given project. You can open or delete builds, view statistics, or compare builds here.
Click on a build to go to the Build Browser.
Build Browser
This is the basic screen where you can see your code and your packaging rules.
Viewing Rules
In the Rules tab, you can see and edit your configuration rules, and see what these rules match.
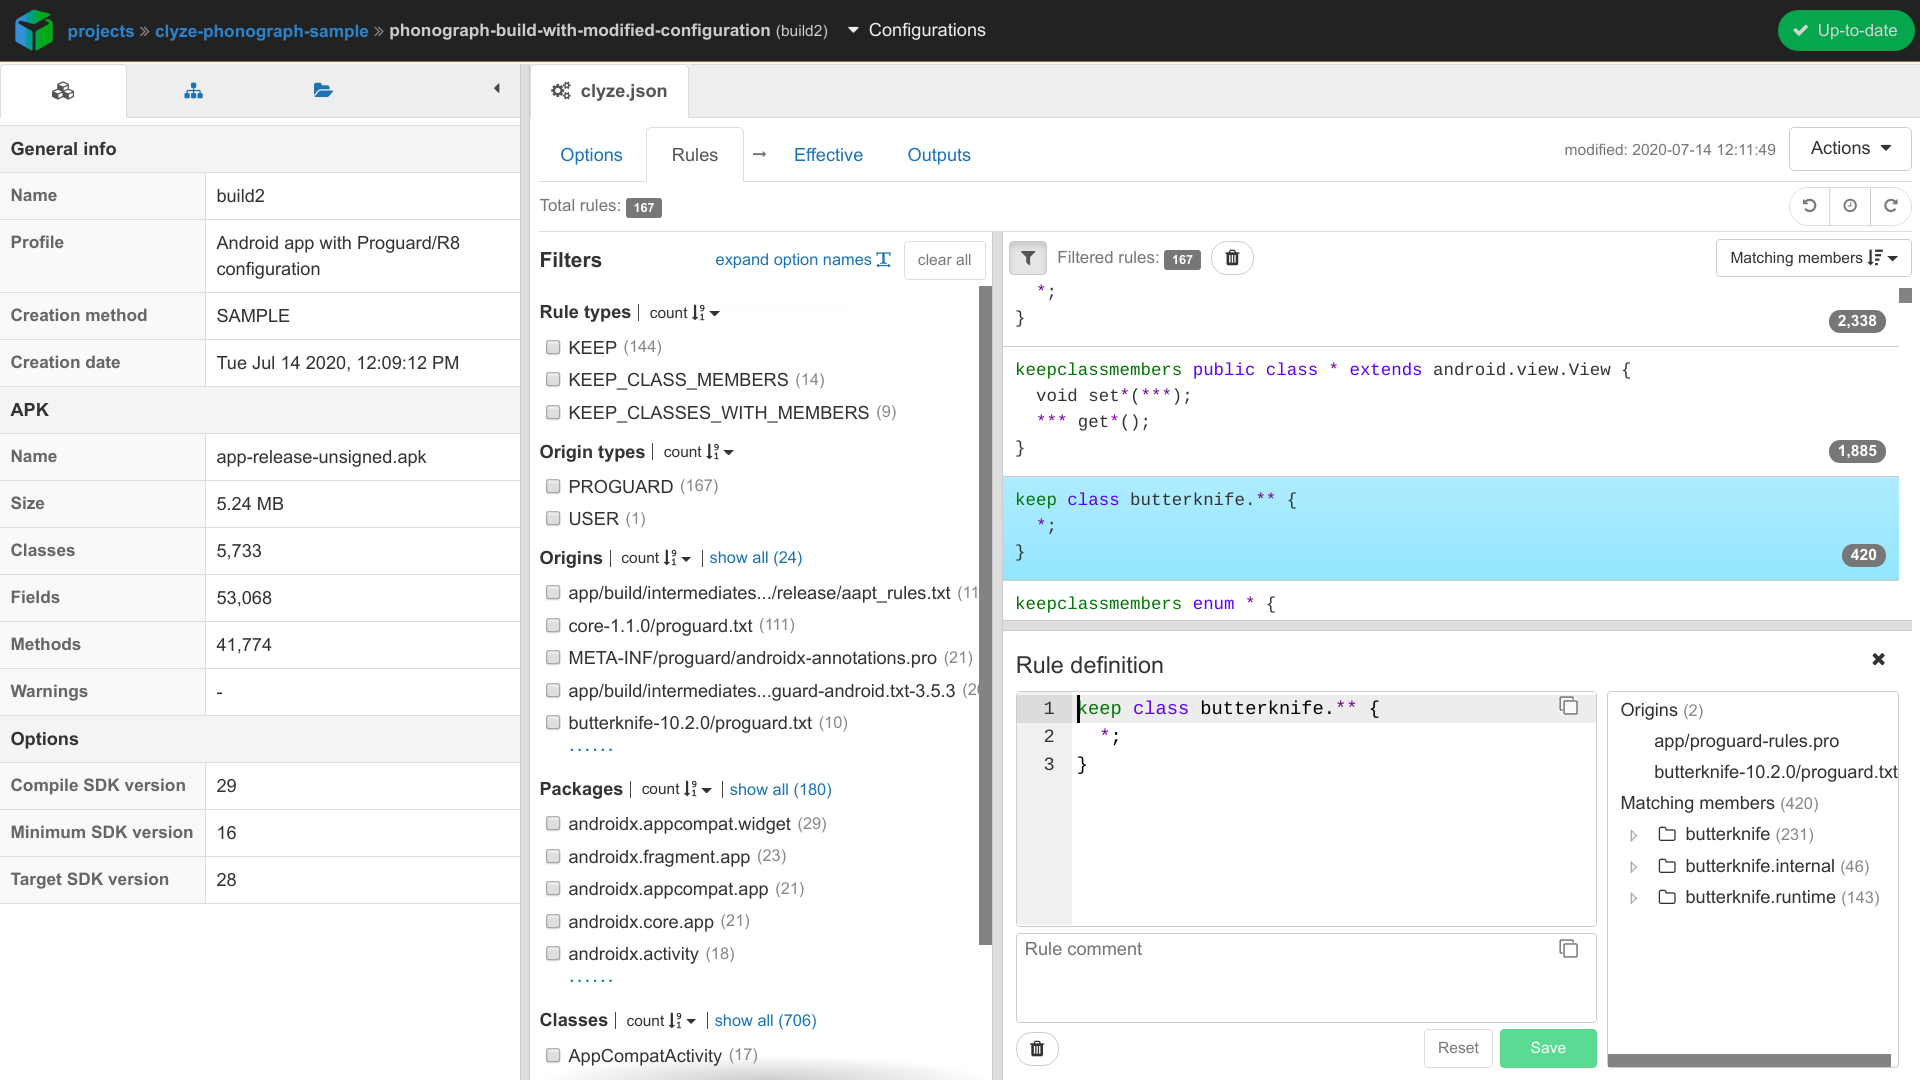
To see the final effect of all rules, click on "Analyze / Pack" to compute the results in tabs "Effective" and "Files".
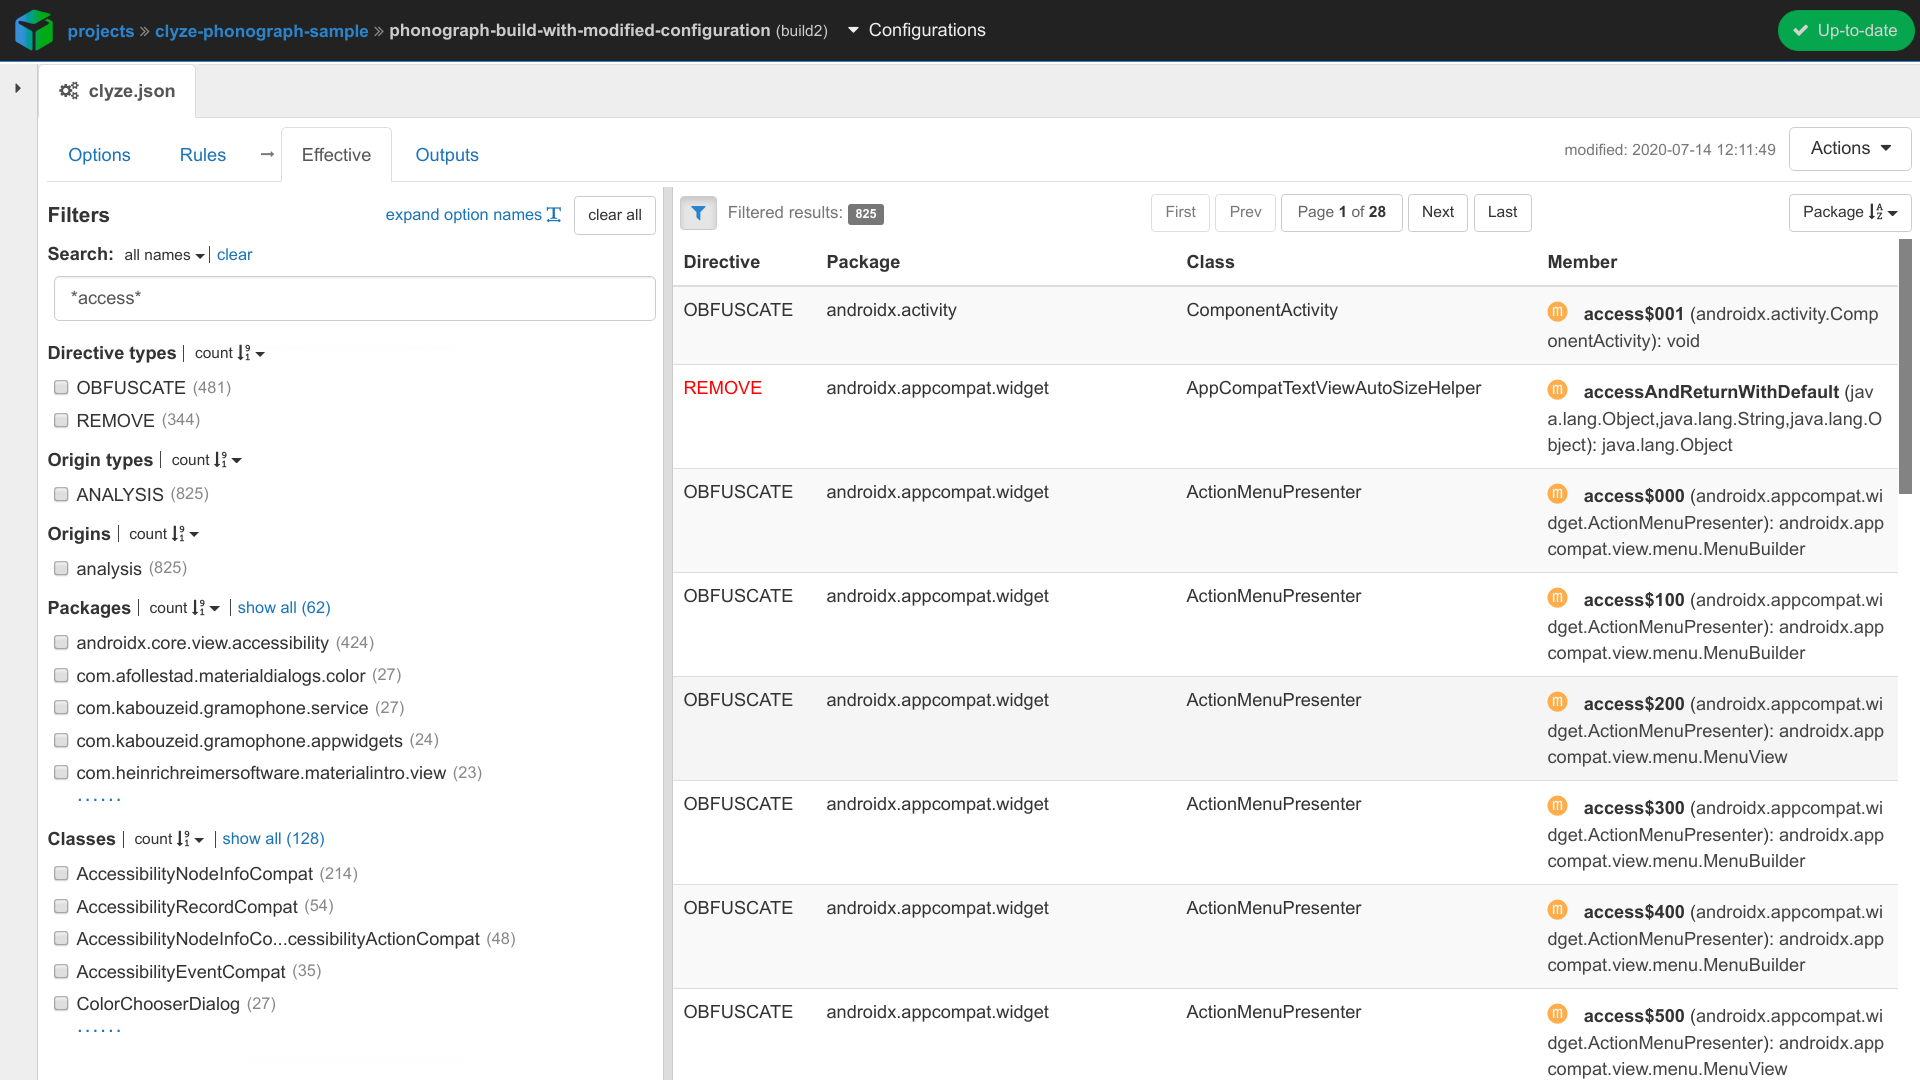
Effective Rules ("Effective" Tab)
Big projects may contain many rules which ineract to produce the final repackaged application. In the screenshot below, we filter the effective rules to see obfuscation/optimization effects for methods and fields that contain "access" in their name.
Analysis Results ("Files" Tab)
When you are ready, click on "Analyze / Pack" at the top right. The results of the analysis will be available in the "Files" tab: your packaged app, the packaging rules used, and useful information about what was deleted or obfuscated.
Advanced
Automatic Repackaging
You can repackage your app from the command line (to use for example in a CI environment). This is only supported in Gradle (see [gradle-integration]).
-
Export the configuration rules from Clyze, for example saving them as file "clyze.json".
-
In your Gradle file, insert the following in your Clyze settings block:
clyze {
   ruleFile = 'clyze.json'
}-
Call the Gradle repackaging task:
gradle clean createBuild repackageSigning
When an app is repackaged, the resulting APK/AAB file is normally unsigned, so that you can use your own signing machinery. However, you may want yor application to be ready for deployment or testing, and not want to go through an extra signing step.
To make deployment faster, Clyze supports a "self-sign" project option, where the packaged application will be signed using the signing credentials given during the installation (see Getting Started).
For example, you can give as signing credentials the debug keystore generated by Android Studio. Alternatively, if your signing setup is simple, you can set up Clyze to sign your release build using your own keystore, key alias, and key password.